Freely Publish a Page on the Wild Wild Web
Did you know that the World Wide Web used to be a magical place, where you could freely publish a web page that anybody could read? Did you know that the World Wide Web is still a magical place like that?

Historical WWW Logo by Fakefunk
CC BY-SA 4.0, via Wikimedia Commons
We’ve all spent the last umpteen years living our Internet lives within the walled gardens of corporate social media, and may have forgotten the Wild Web that exists outside our garden walls.
In this brief tutorial we will take a very small step outside the garden. All we are going to do is publish a single page to the World Wide Web, using freely available tools and services.
This should take about 15 minutes, maybe a bit longer depending on how much stuff you want to write into your page.
Once you know how to do this, be warned: you may be tempted to create more pages, and soon you’ll have a full-blown web site on your hands!
I won’t go into much detail on what we’re doing or why as we go through the steps. The goal is to experience just how easy it is to get a webpage up and running. In the Behind the Scenes section I’ll go into more detail and give some further options.
Contents:
Step 1: Write Your Page’s Source
Our first step is to write the “source code” of our webpage. Source code just means the plain-text-with-special-formatting-marks that gets turned into a web page.
The first thing you need to do is open a text editor. To make this as easy as possible, we’ll use a web-based editor hosted by a reputable non-profit (specifically, Wikimedia’s Etherpad).
Click the following link to open the editor:
https://etherpad.wikimedia.org/
Click “New Pad”. Read the disclaimer text, and then select and delete it. Click the Settings gear (, upper right on desktop, lower left on mobile), and turn off “Authorship colors”, which can be distracting. What we want to edit is plain text, so please ignore the formatting buttons at the top of the editor.
Now that you’ve got your editor open, it’s time to write some fantastic Web content!
We’re going to use a markup language called Markdown to write our page. Don’t worry at all about what that means, it’s enough to say that if you type something like this into your editor:
# My Great Web Page Title

This is the text of my **web page**, and *here* is a link:

[Great Tutorial on Publishing Web Pages](https://andrewcodispoti.com/publish-a-site-on-the-wild-web/)
… that somewhat funny-looking plain text will eventually be transformed into a web page that looks roughly like this:
My Great Web Page Title
This is the text of my web page, and here is a link:
Notice the bold text, italics, and how the link has been created? Those are the basics of Markdown. If you want to do some fancy stuff like a list, image, or quote, check out this Markdown quick reference.
What to write about? I leave that to you! Write about your cat, or your hobby, or write a review of this tutorial! Just remember that what you write is going to become a public webpage in the next step, so don’t write anything personal or give out any identifying information. Imagine you are writing this on a canvas for display in a busy public park.
Here’s mine (I’ve colored the text so it’s easier to read the Markdown):
# Web Page About Brother Cadfael
I am (re)reading the **Brother Cadfael** mysteries by Ellis Peters, the *nom de plume* of [Edith Pargeter](https://en.wikipedia.org/wiki/Edith_Pargeter).
Cadfael is a [Benedictine](https://en.wikipedia.org/wiki/Benedictine_monk) monk who solves murder-crimes in [Shrewsbury](https://en.wikipedia.org/wiki/Shrewsbury_Abbey) in 12th-century England and Wales.
Here is a picture of the "Cadfael Window" at Shrewsbury Abbey:

Image by AndyScott, CC BY-SA 4.0 <https://creativecommons.org/licenses/by-sa/4.0>, via Wikimedia Commons
Well, that's all for my web page for now! Come back and visit for updates.
Note how I included lots of links (the Web loves links), and an image.
Of course whatever you write is just going to look like plain text right now. Not much fun as a webpage! Before we move to the next step we’re going add a single line at the bottom of your file that will turn that plain Markdown into an actual webpage in the next step.
Copy-paste this long line at the bottom of your file (make sure you get all of it, scrolling right if necessary):
<!-- Markdeep: --><style class="fallback">body{visibility:hidden;white-space:pre;font-family:monospace}</style><script src="markdeep.min.js" charset="utf-8"></script><script src="https://morgan3d.github.io/markdeep/latest/markdeep.min.js" charset="utf-8"></script><script>window.alreadyProcessedMarkdeep||(document.body.style.visibility="visible")</script>
Make sure it has a blank line above it, and that it’s all on one line. For example, here are the last 3 lines of my source:
Well, that's all for my web page for now! Come back and visit for updates.

<!-- Markdeep: --><style class="fallback">body{visibility:hidden;white-space:pre;font-family:monospace}</style><script src="markdeep.min.js" charset="utf-8"></script><script src="https://morgan3d.github.io/markdeep/latest/markdeep.min.js" charset="utf-8"></script><script>window.alreadyProcessedMarkdeep||(document.body.style.visibility="visible")</script>
Now to save your file. In the Etherpad editor, click the import/export button (upper right on desktop, lower left on mobile):
Click “Export current pad as: Plain text”. This will save the file to your downloads folder on your computer or phone, depending on browser settings.
Step 2: Upload to the Web
Now we’re going to need a place to freely publish our soon-to-be-web-page. We’ll use Neocities, a free web-publishing service supported by users and by donations (not ad revenue). Feel free to read more about Neocities before proceeding.
When you’re ready, open the Neocities home page in a new tab:
On the right you’ll see a form with the title “Sign Up for Free”. Fill it out! You’ll need a name for your site, an email address (use a real one so you can confirm it), and a password. If you want you can add some “tags” related to your site.
Here’s what my form might look like:
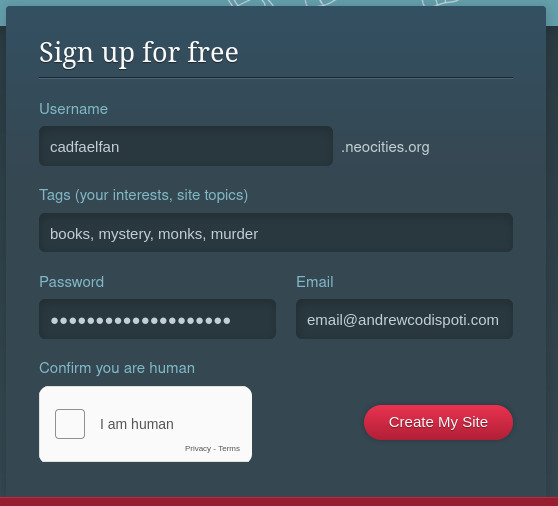
Don’t forget to prove you’re human, and then click “Create My Site”.
Neocities will ask you to consider a Supporter membership, but you don’t need that – just click “Continue” on the left.
Once you’ve clicked “Continue”, Neocities will send you an email to confirm that you own that email address. Wait for the email, then copy the code from the email to the Neocities page and click “Confirm Email”.
Now that your email is confirmed, you can create your page. Visit the Dashboard:
https://neocities.org/dashboard
Neocities has provided you with a default home page, but we’re not worried about that right now – let’s upload the page you’ve created with Markdown.
Click the red button “Upload”, and find and select the file you downloaded from Etherpad.
Neocities will upload the file, and you’ll see it in the file list on the dashboard. Hover over this new file and click “Rename” (on mobile the “Rename” button is shown to the right of the filename).
Type in a name for your file. You can name it whatever you want, but be sure that it ends with .md.html. For example, I will name my file aboutcadfael.md.html. Click “Rename”.
Now click on the file name to view your web page!
Here’s mine: https://cadfaelfan.neocities.org/aboutcadfael.md.html
You’re done!
You’ve created a neatly-formatted web page from a Markdown source file, and it’s hosted for free on the Web!
You can repeat the steps above (create and edit a Markdown source file, save it, upload it to the Neocities Dashboard, and rename it) to create more pages.
For a bonus, try linking between two pages. For instance, if I create a new source file, I might put the following Markdown code into it to link to my first page:
Don't forget to read [about Brother Cadfael](aboutcadfael.md.html).
Use the file name you chose above (ending with .md.html) in your link.
Here’s my new page:
https://cadfaelfan.neocities.org/otherinterests.md.html
That’s it for the main body of this tutorial! I hope it’s been helpful to you. The rest of this page is going to talk in more detail about what we’ve actually done, in case you want to get behind-the-scenes.
This tutorial is offered freely as a contribution to the commons (see below for license information).
Behind the Scenes: What have we done‽
In this section we’ll talk a bit more in detail about the parts that go into making the tutorial work – tools, services, and some context. It’s completely optional, of course – you’ve already created your web page and have the capability to create more!
On Editing Plain Text
To make things easy, we used a web-based text editor in this tutorial, but it’s important to know that you can edit plain text Markdown source code using a wide variety of tools.
If you’re using a computer (as opposed to a phone), you have a default text editor installed. If you’re on Windows, there’s Notepad. On Mac, there’s TextEdit. On Linux there are a wide variety of default text editors depending on your chosen desktop environment, but they should be easily accessible in your menu or launcher.
Phones sometimes come with a plain text editor installed, or you may have to download an app. Or you can use a web-based editor (probably easiest).
If you want to get fancy, you may consider using a dedicated Markdown editor for editing your Markdown source files. I’ll go into more detail about how this works in another tutorial later on, but here’s a list if you want to explore:
- Hedgedoc (web-based)
- Cryptpad (web-based)
- use the Code document type when creating a new document
- Abricotine – a nice desktop editor with built-in preview
On Markdown
There’s lots of information about Markdown around the web. Here are a few helpful pages:
- Daring Fireball: Markdown – The original Markdown.
- Wikipedia: Markdown
- Markdown Quick Reference and 10 Minute Markdown Tutorial
Markdown looks fine as plain text, with no formatting. It’s similar to how you might have formatted an email before rich-text email was developed. But the great thing about Markdown are the many programs that can parse Markdown (translate it) into richly formatted webpages.
In this tutorial we use a program called Markdeep to parse our Markdown. This program is linked to in the final line we add to our source, and when the source is opened by our web browser, it loads & runs Markdeep to transform our source into a webpage. More information can be found on Markdeep’s website: https://casual-effects.com/markdeep/
There are other ways to parse Markdown (Pandoc can do this, among many other things), but most Markdown editors (see above) will have a feature to export your source as HTML (i.e. a webpage).
On Publishing Web Pages
We used Neocities to publish our webpage in this tutorial, because it’s free and easy. There are many ways to host webpages freely and cheaply, and I’ll go into more detail on some of the options and how to use them in a future tutorial. In the meantime, here’s a brief list of some of the options:
- Free:
- Gitlab Pages
- Join a tilde server (a future tutorial will talk about what the heck this means and how to do it)
- Cheap: